When we use a camera in a game, it’s usually to choose what the player sees and send it to the monitor. As explained in Introduction to Shaders, the GPU gets the current frame data from the CPU, processes it, and sends the final pixels to its video outputs (or to the operating system - this is essentially the difference between “Fullscreen” and “Windowed Fullscreen”). But that’s not the only thing you can do with a camera: you can also make it render to a texture and use that texture in a material or shader.
Chances are you’ve (unknowingly) used this many times before: almost all modern 3D games render shadows in this way. Imagine that you are the sun. Whatever you see is lit by sunlight. Whatever you don’t see - because there’s another object in-between - is in shadow. The sun in modern games literally works this way: it is a camera which renders its depth buffer to a texture, and when computing shadows, we check whether we’re on the surface seen by this camera, or beneath it.
Here you can see the sun’s view next to a rendered frame of a cube that drops a shadow onto the plane below:
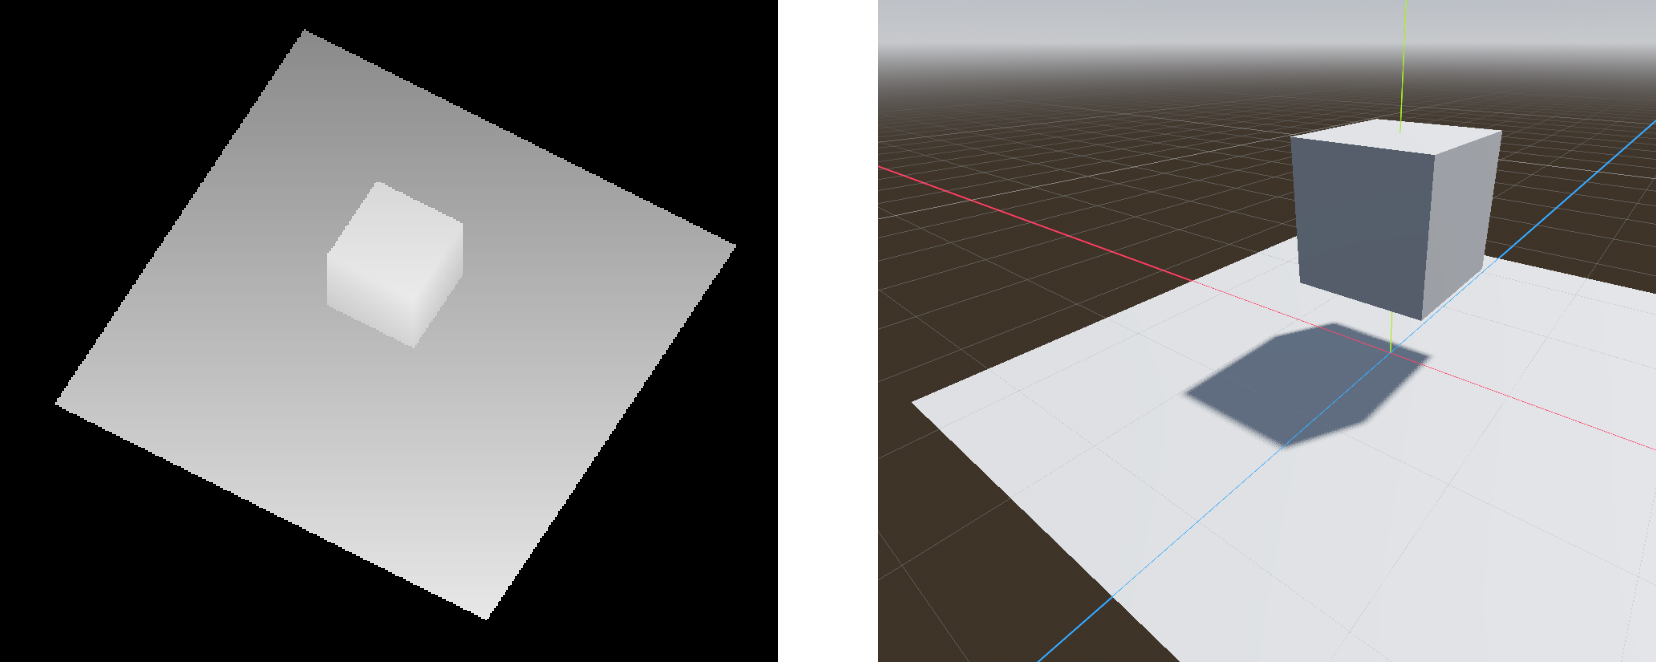
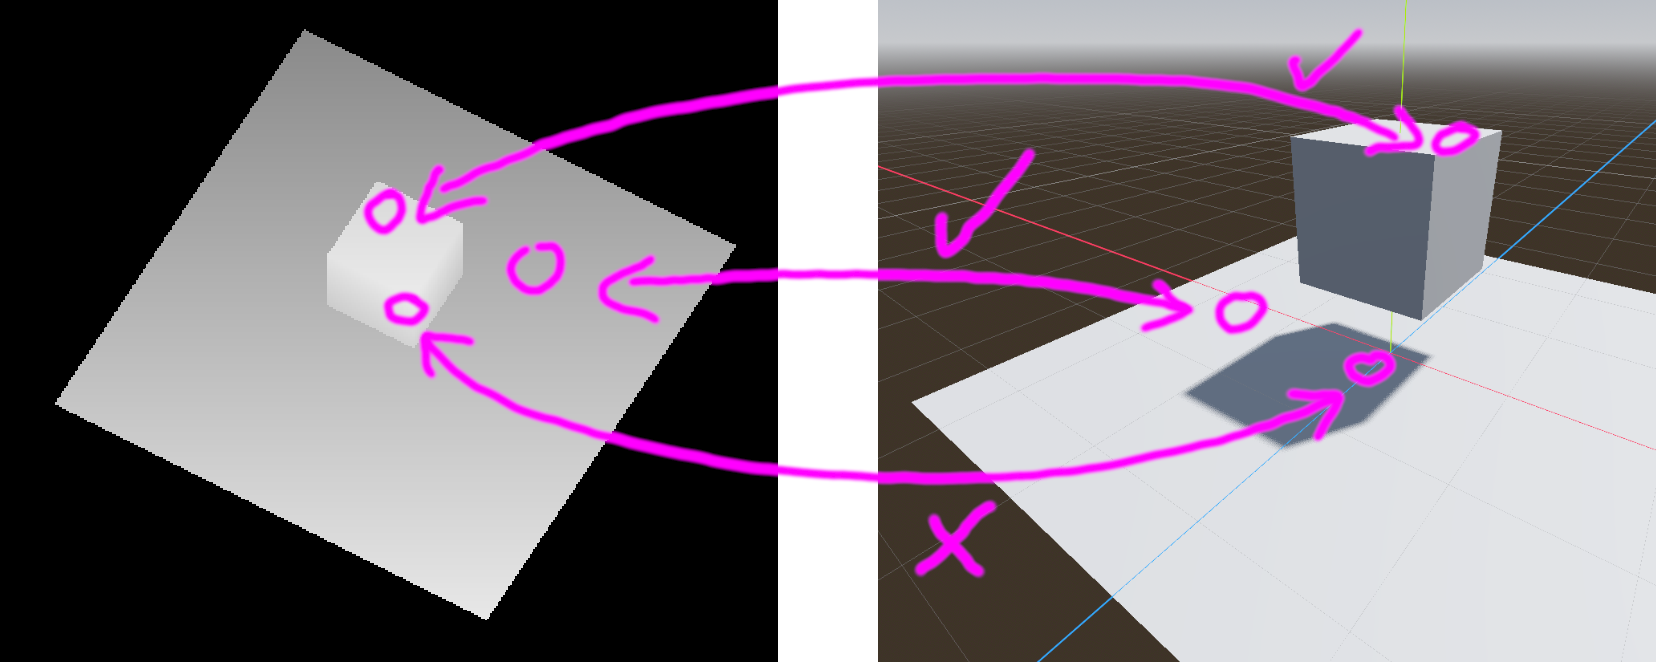
The parts where a point on a surface matches up with a point seen by the sun are lit. When a point on a surface is further away than what the sun sees, that point is shadowed.
You may have noticed that, in game engines, shadows use “shadow maps” and these have a resolution which can be modified. This is why: they are just the result of a camera rendering to a texture, and that texture has a certain resolution. The “sun camera” renders every frame, just like the normal camera does. In addition, the more geometry this “sun camera” has to render (the more objects you have which are configured to cast shadows), the more performance these shadows cost.
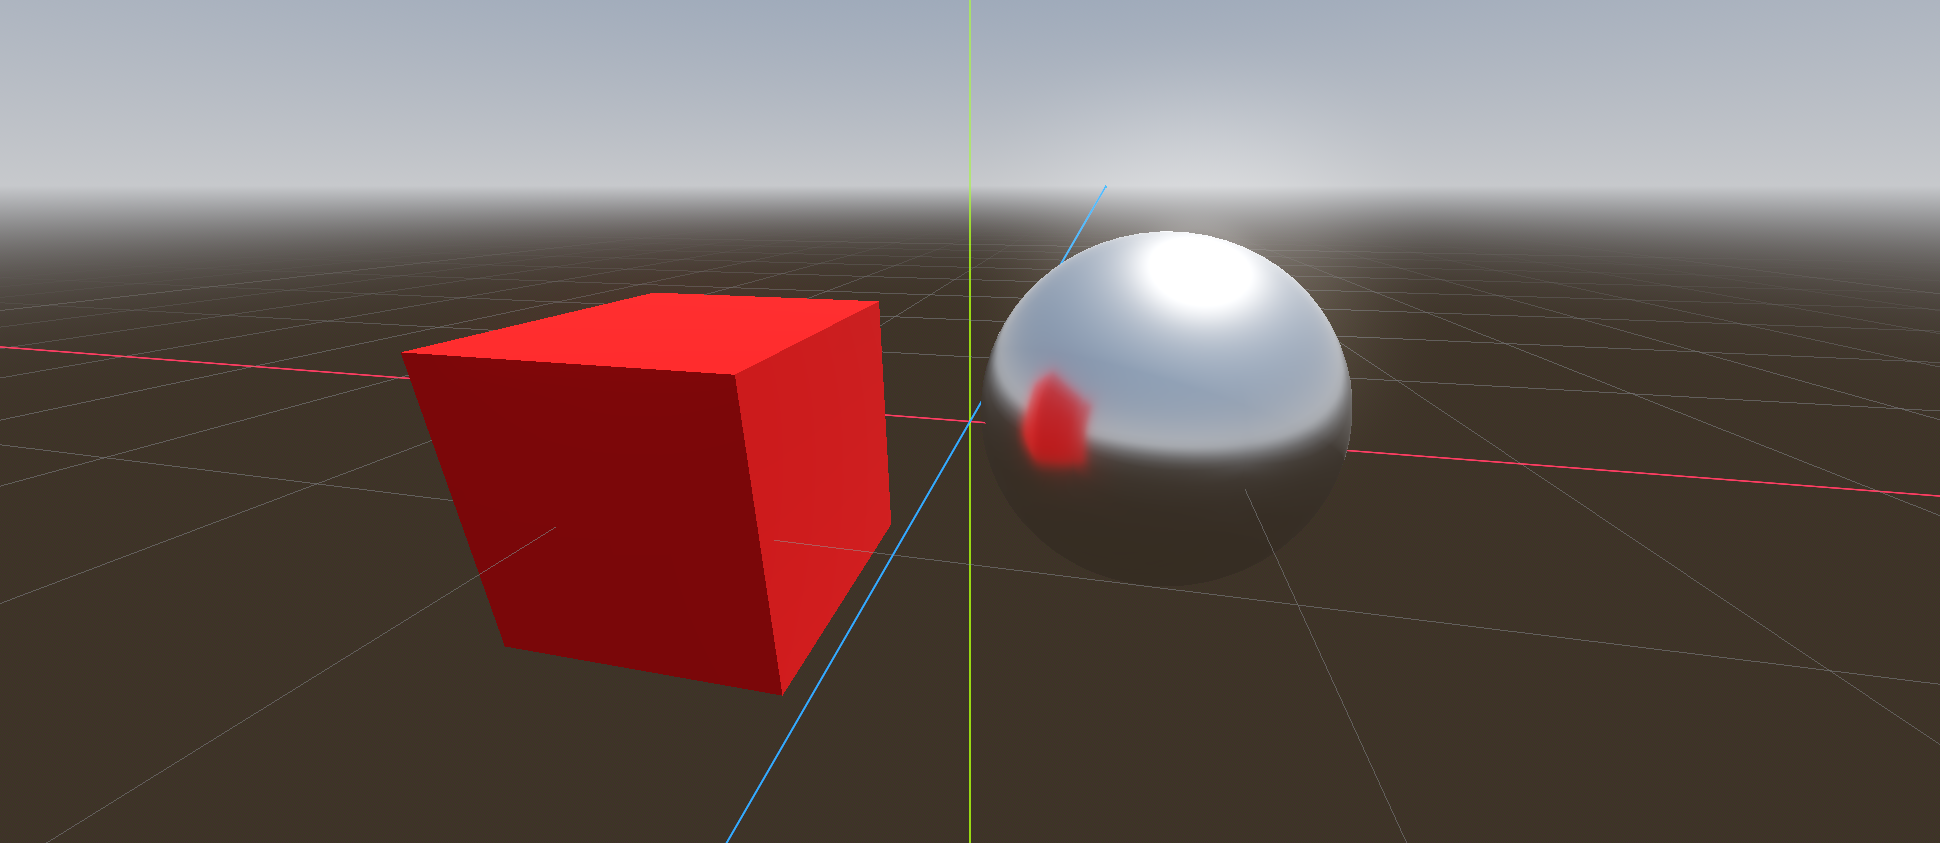
Another common under-the-hood usage of render textures are reflections. When an object is shiny and reflects the environment, how does it know what its environment looks like? It has to somehow combine the reflection with its own texture and material parameters. Well, the environment is simply another texture, and ReflectionProbes are the cameras. They typically render to cubemaps, which looks like this:

If you were to fold this up into a cube and stand inside it, you would have a 360° view of the environment. Using this, we get reflective surfaces:
These are just two of the most common ways render textures are used in all engines. This technique is used in a variety of other custom effects too. Think about mirrors: what do you see on a mirror’s surface? You see what a camera behind the mirror would see, and that’s exactly how a mirror can be implemented. The Portal games probably render portals in a similar way (though there’s definitely a lot of additional trickery at play there).
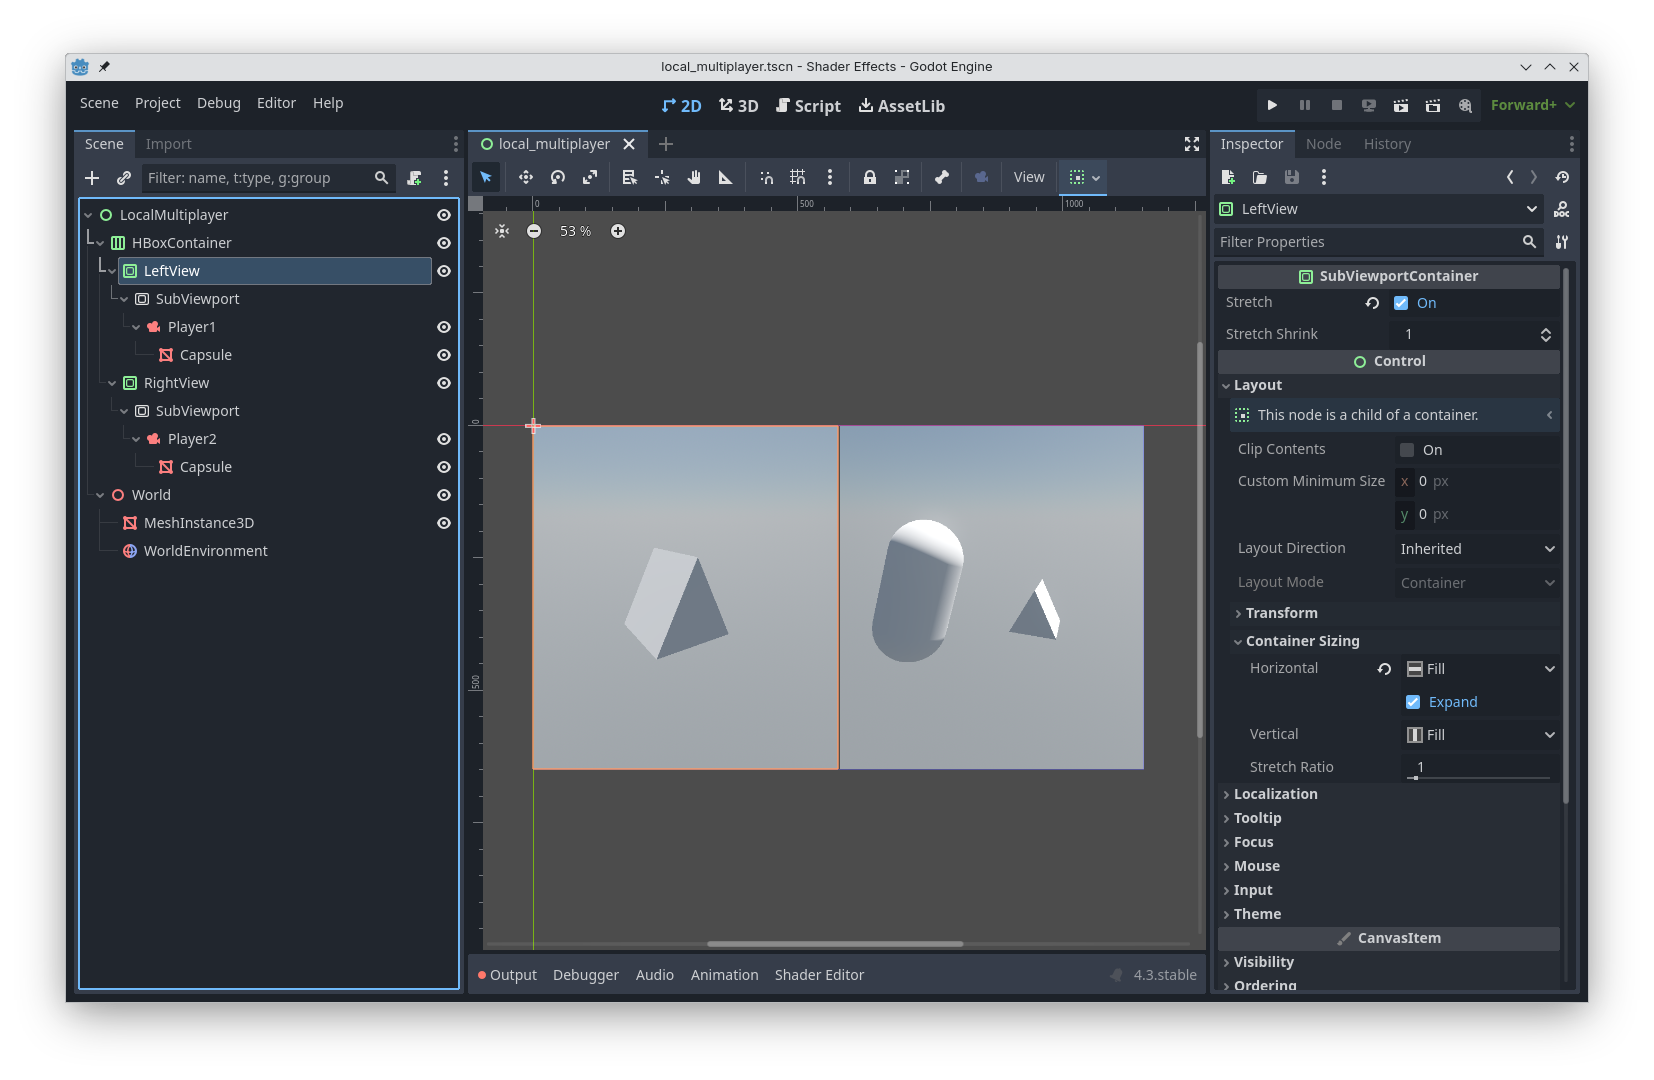
Another use-case is local multiplayer: when you want to render two different views side-by-side, you need two distinct cameras, each rendering to its own texture, which are then put next to each other in the UI.
There are a lot of more abstract use-cases as well, but we will get to those in a later article.
Rendering to Textures in Godot
In Godot, cameras render to Viewports. By default, cameras render to the root viewport which exists in every game, and it’s what’s sent to the operating system as the texture to put into the window. But you can also just add a SubViewport yourself. By putting it into a SubViewportContainer, you can place it into the UI just like any other UI element. This is how you’d make a split-screen multiplayer game:
But you don’t have to display a viewport’s contents directly: you can also access it as a ViewportTexture. ViewportTextures can be used anywhere normal textures can be used, so e.g. all the texture slots in the default material and uniform sampler2D variables in custom shaders.
This means that, without writing any shader code, you can texture an object with the view from any camera in the scene. One example where you might need this would be if your game has surveillance cameras and monitors where you can see what they record; but mirrors and portals are essentially the same thing. To set this up, add a SubViewport with a child Camera to the scene, along with a MeshInstance containing the geometry which you want to texture with the camera’s view:
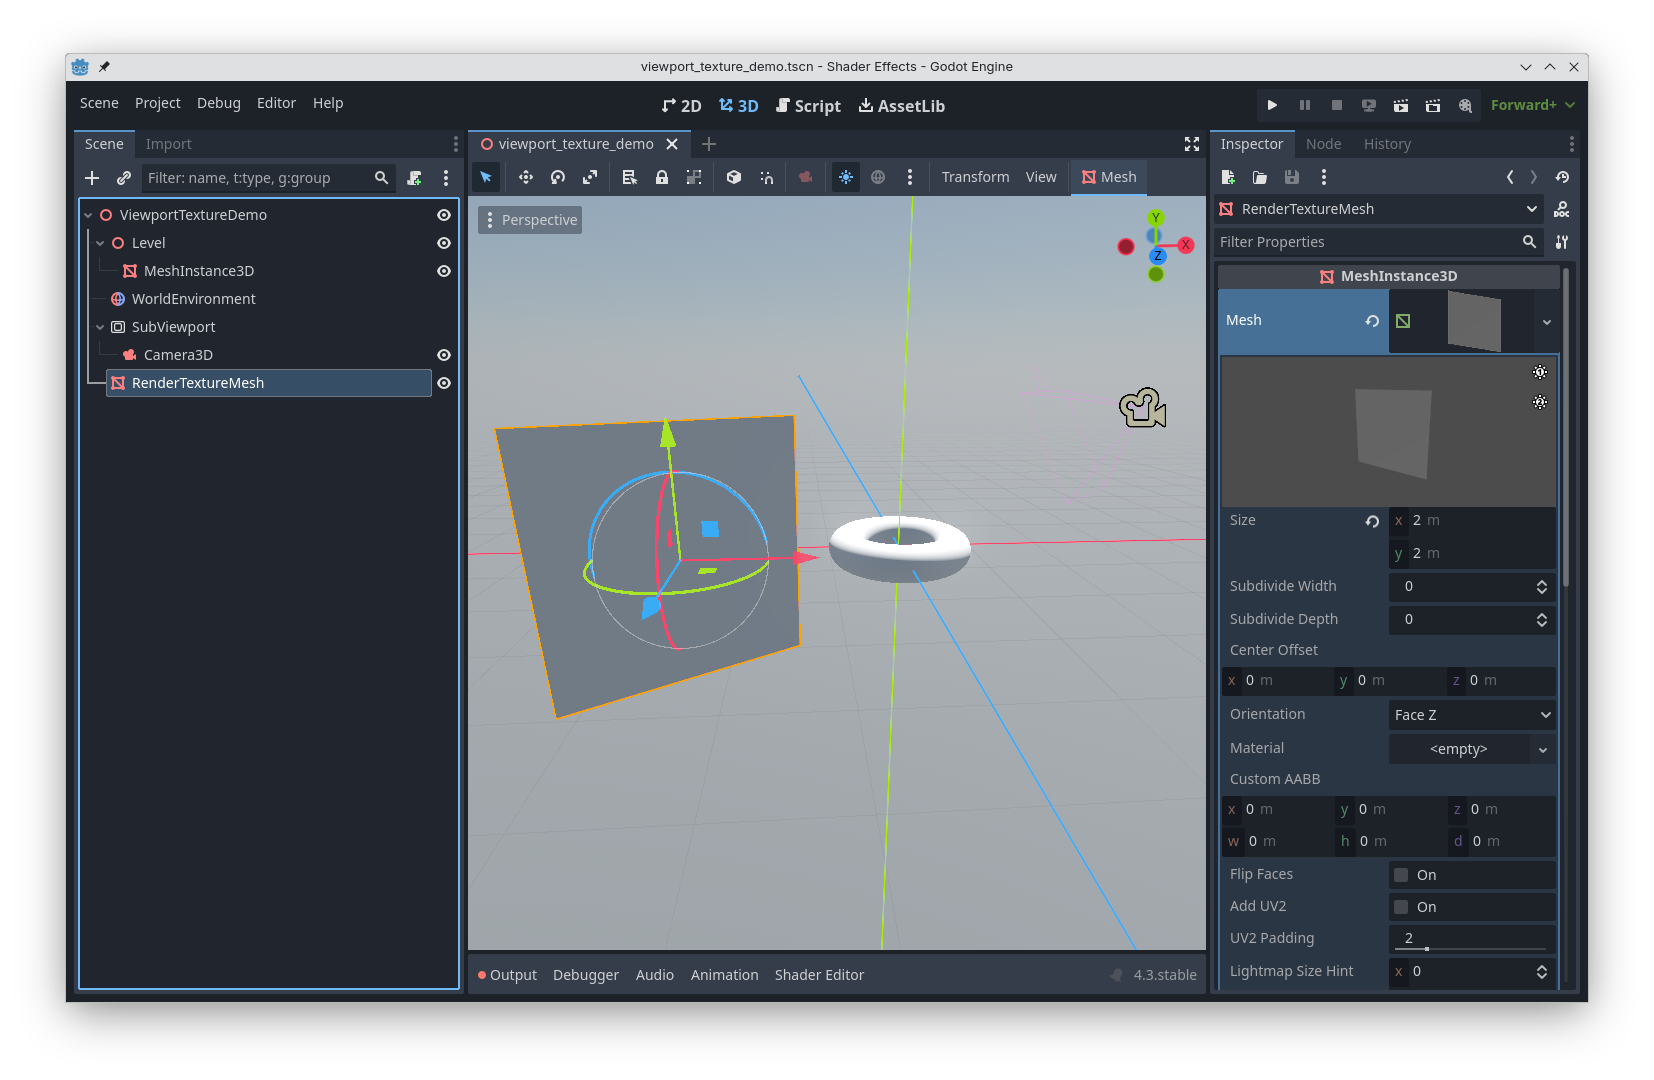
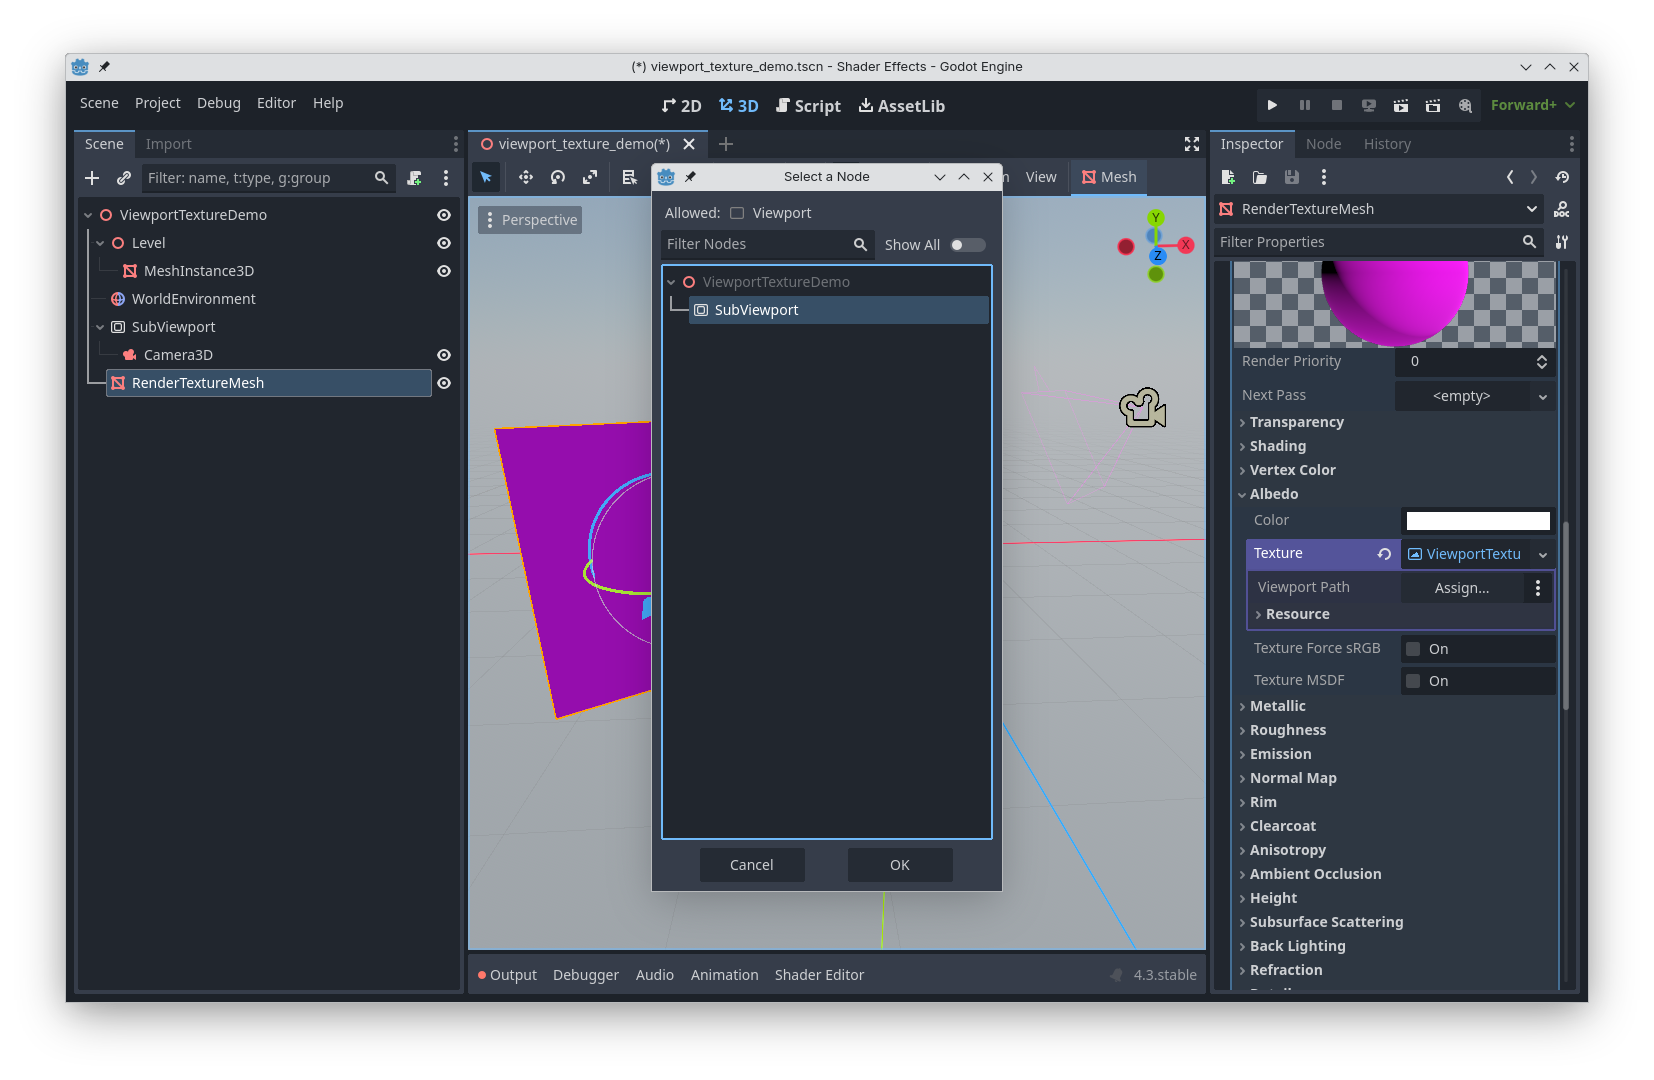
Then, give the MeshInstance a material, go to the texture slot, select “ViewportTexture”, and select the Viewport in your scene. Note that the Material needs to have “Local to Scene” ticked for this, since referencing a SubViewport makes the material depend on other nodes in that specific scene.
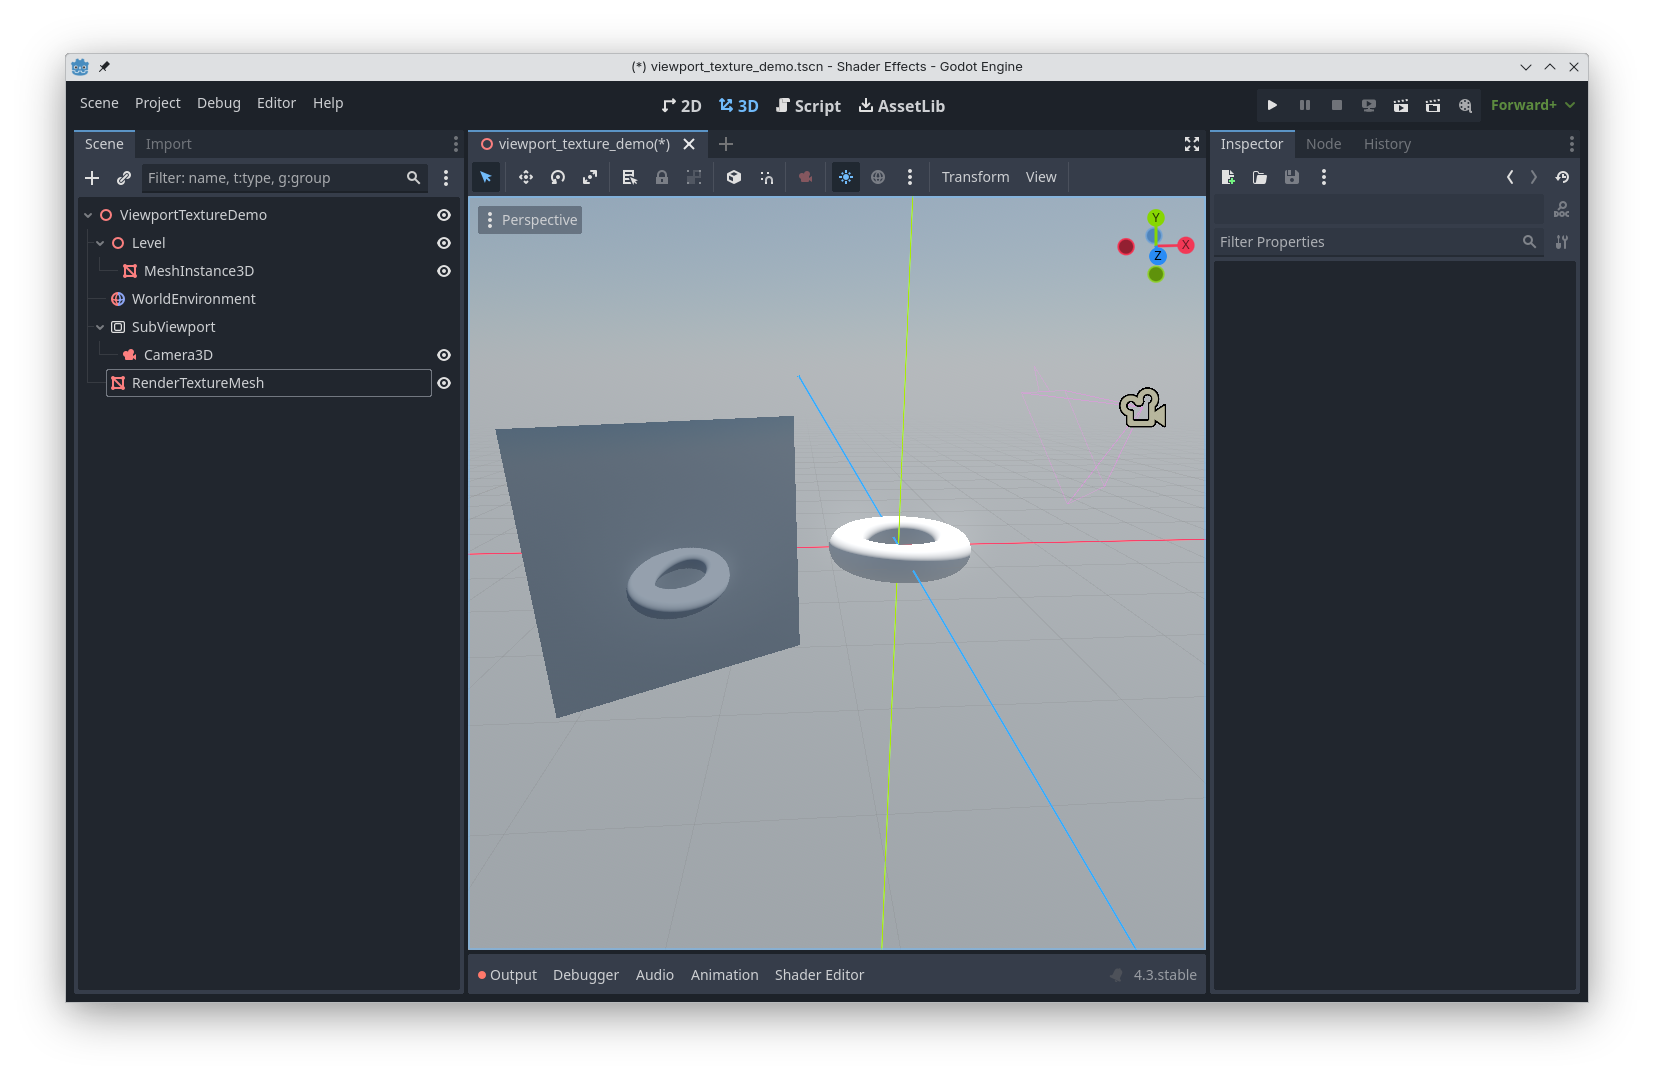
And just like that, you have a plane whose texture is the rendered view of a camera, depicting whatever the camera is seeing at that moment:
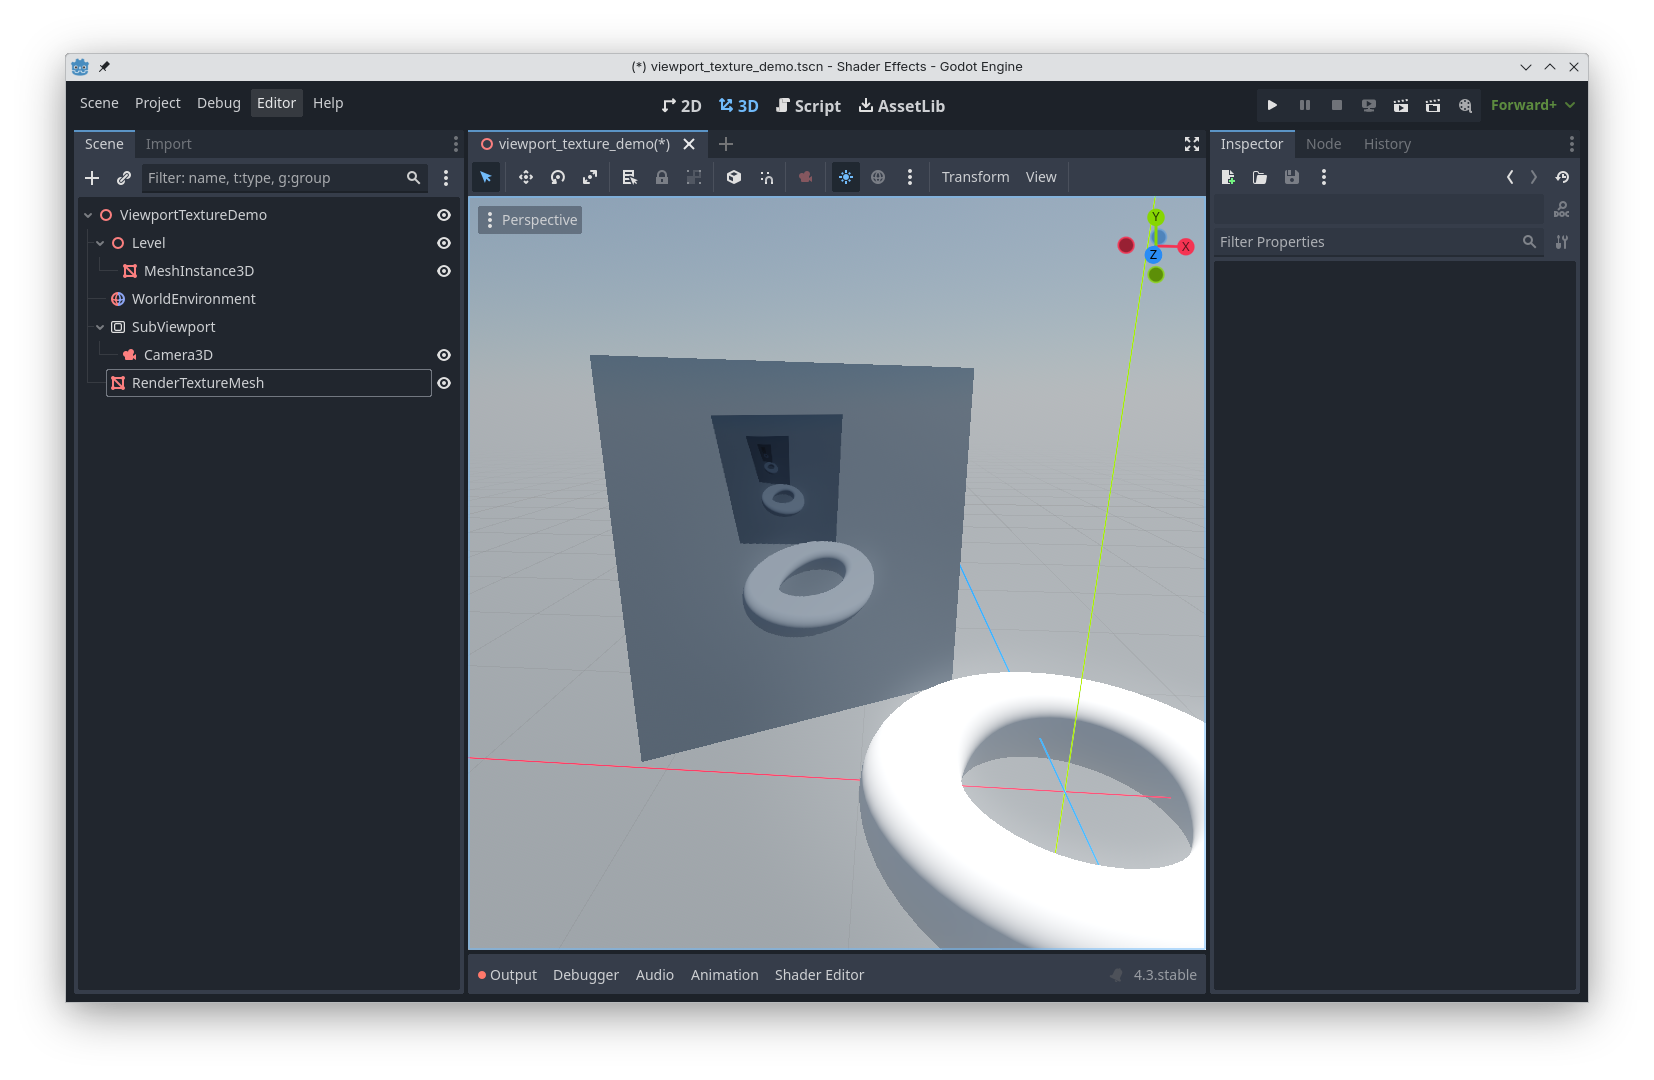
Just like in Portal, if the camera sees the plane it is rendering to, it recursively renders its view:
As noted above, this works exactly the same way for any texture parameters in a shader. And in a shader, you have infinite opportunities of what to do with this texture: you might not display it directly, but use it as data for the logic of how a surface is shaded, similar to how shadows work. I will go into this in a future post, but Martin Donald has a great video on the subject: https://www.youtube.com/watch?v=BXo97H55EhA